
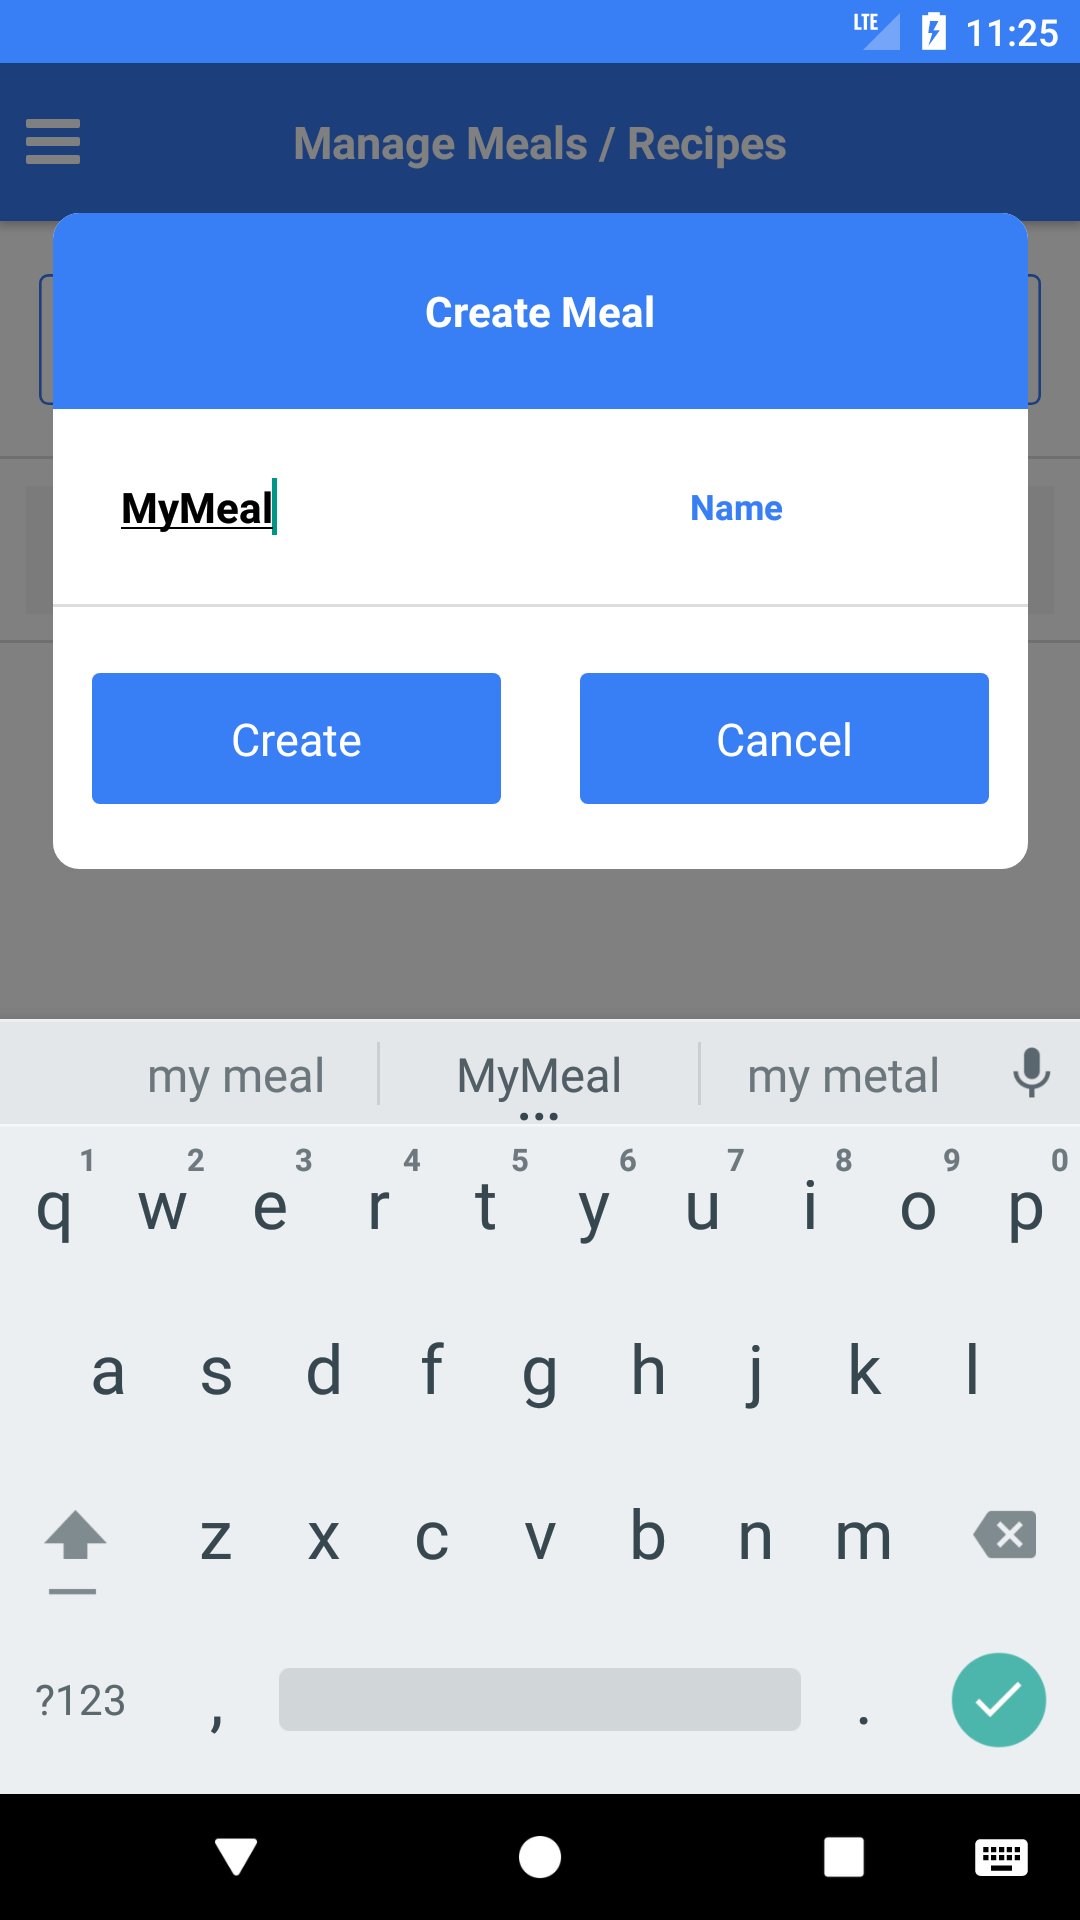
To enter a recipe/meal, you can go to the Meal tab via the Manage side-menu option or when you are adding a food to the Log. Simply click the Create button at the top of the screen to get started.

A popup box will appear for you to enter the name of the new meal/recipe you are creating
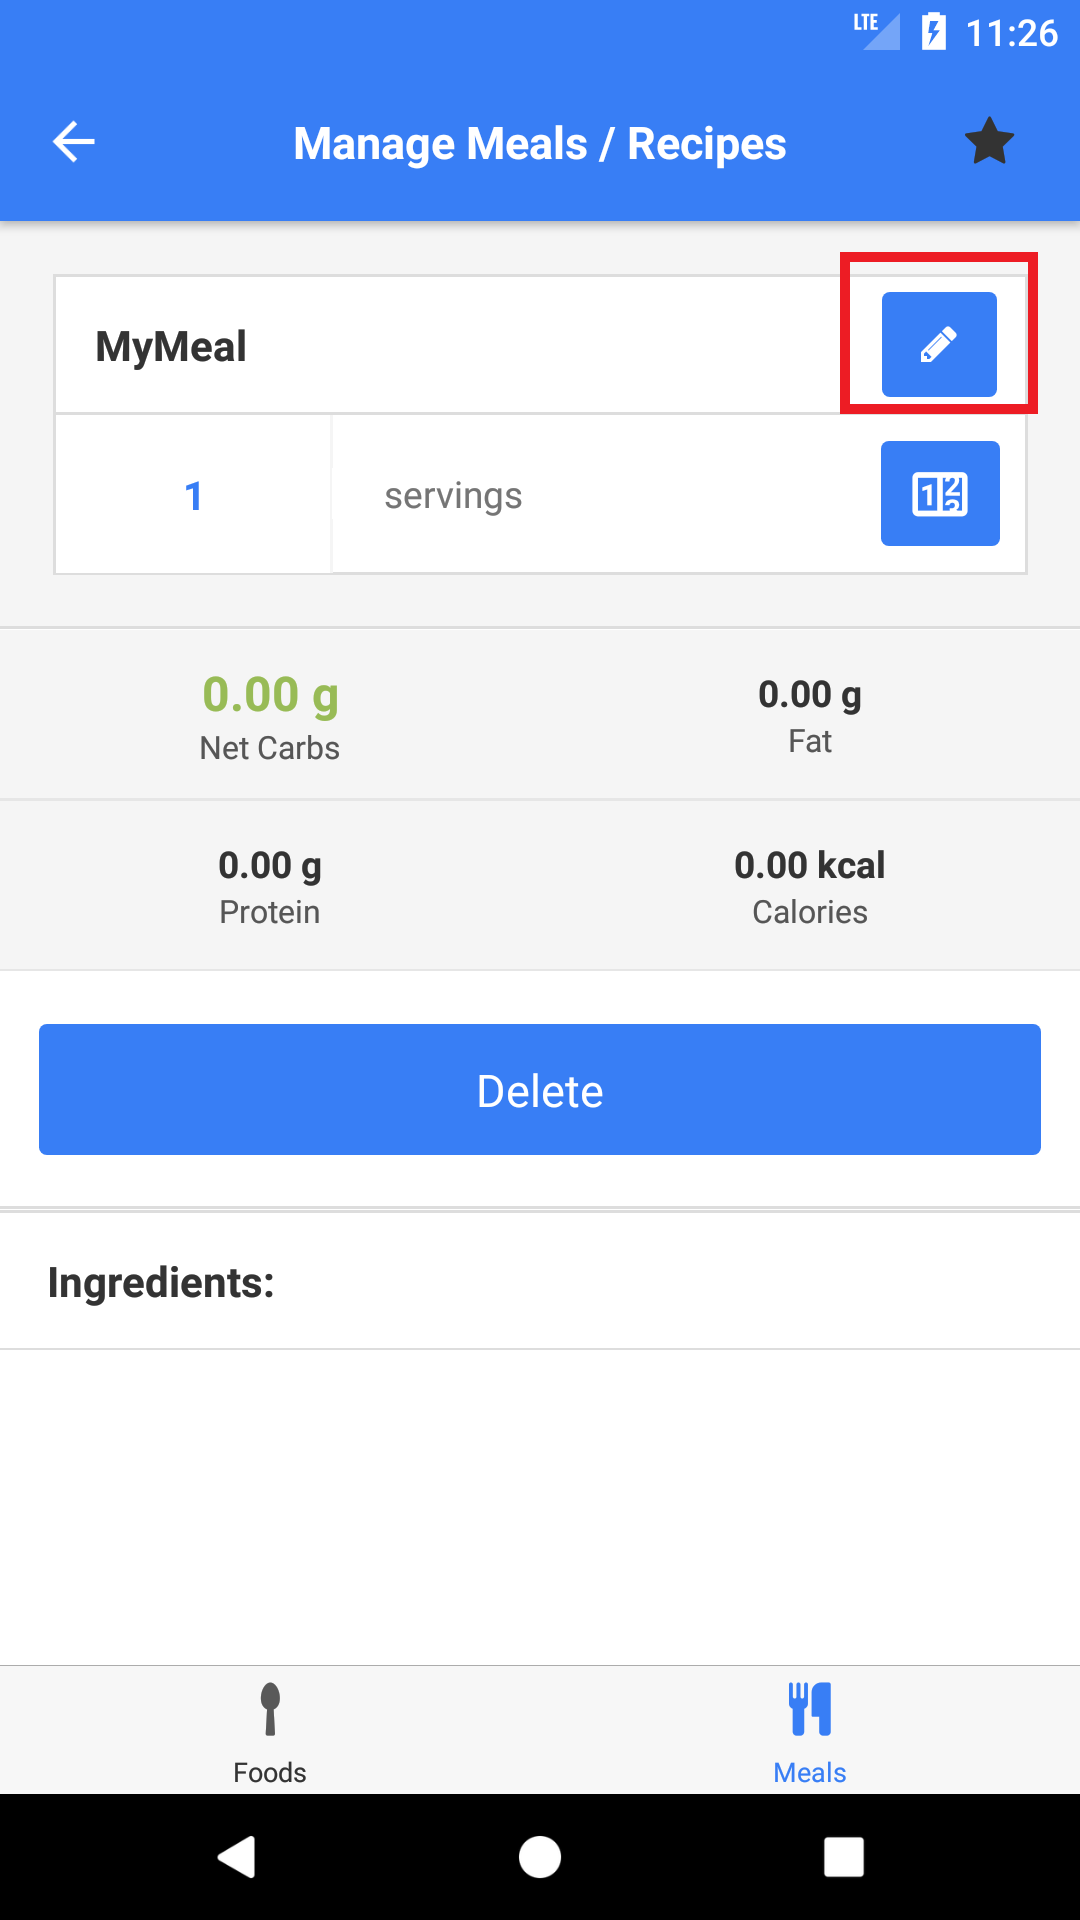
After submitting the popup box, you will be redirected to the blank single meal/recipe page that was just created. In order to start editing your meal, you need to click the blue pencil button in the top right, this enables “Editing Mode”
With Editing Mode enabled, you can now edit the Name, Serving Name, Total Servings Made, and the actual Ingredients (food items) that the meal holds.
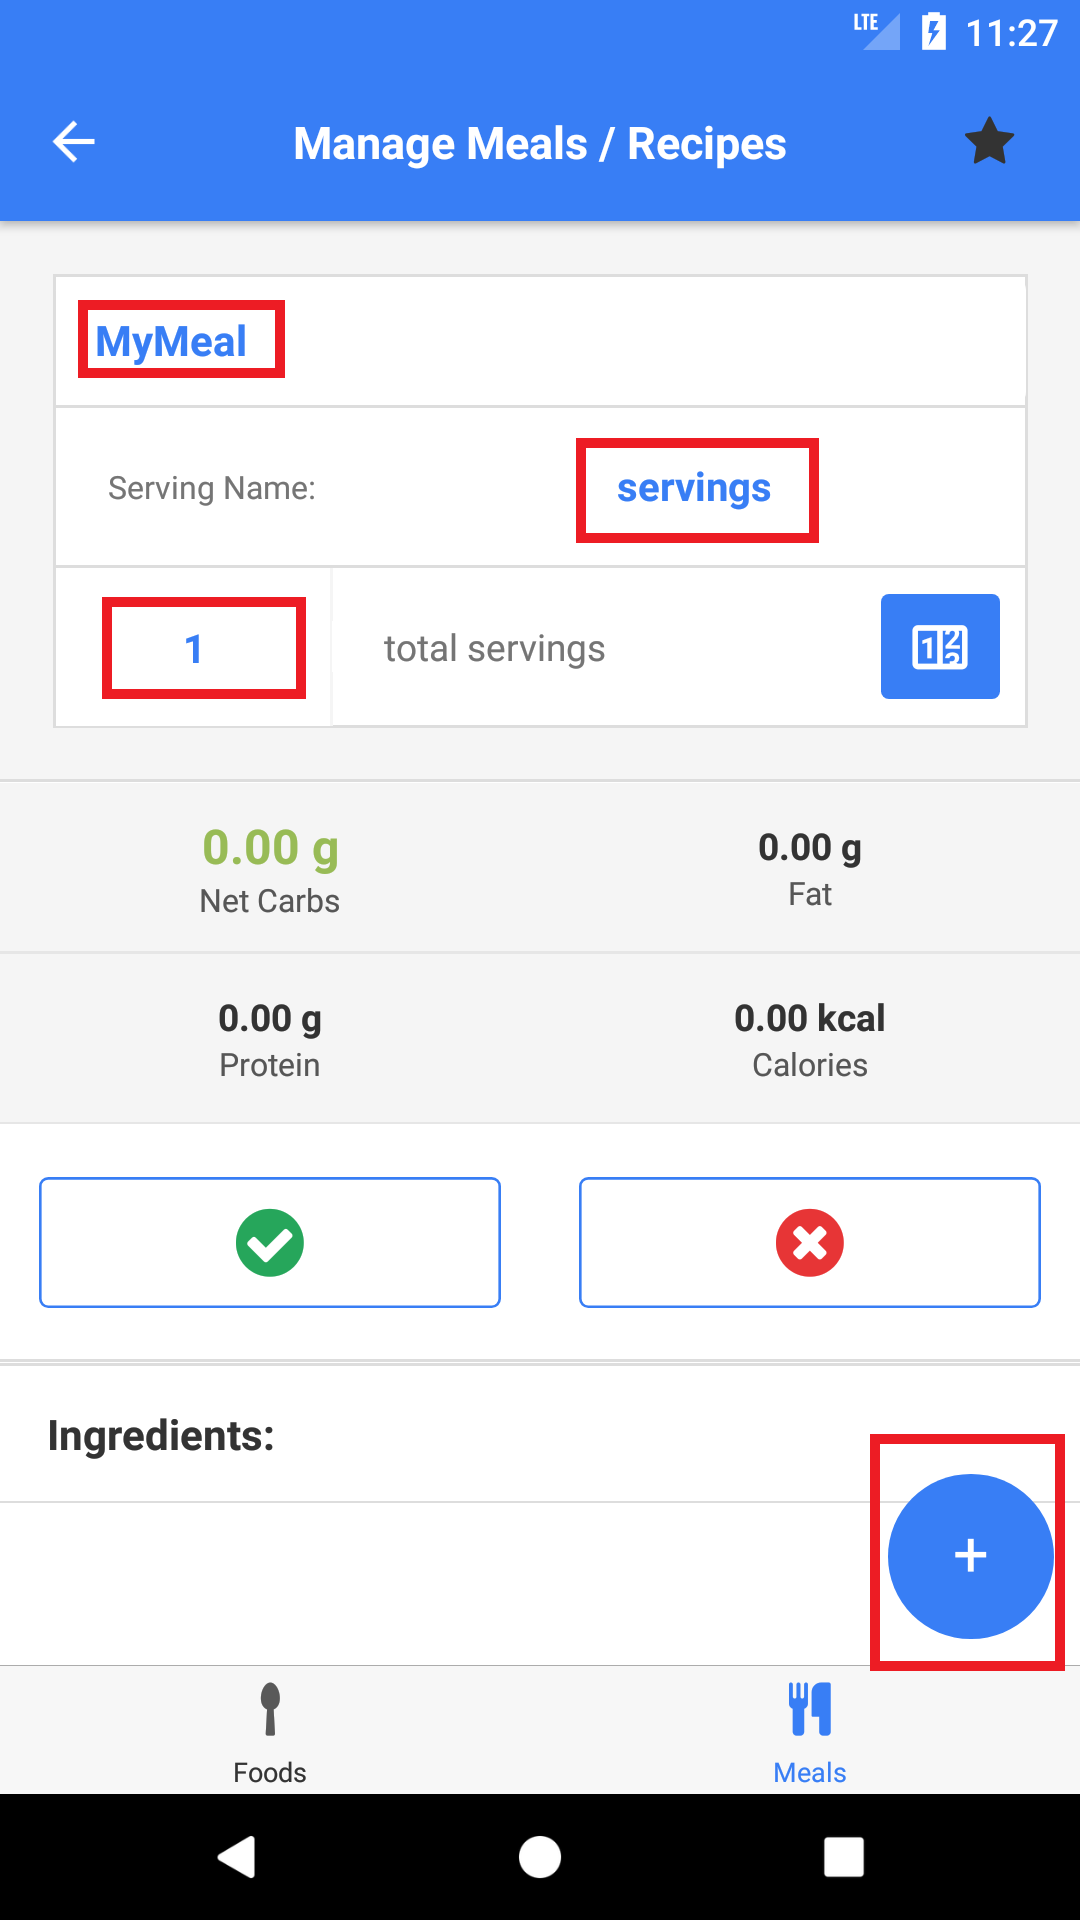
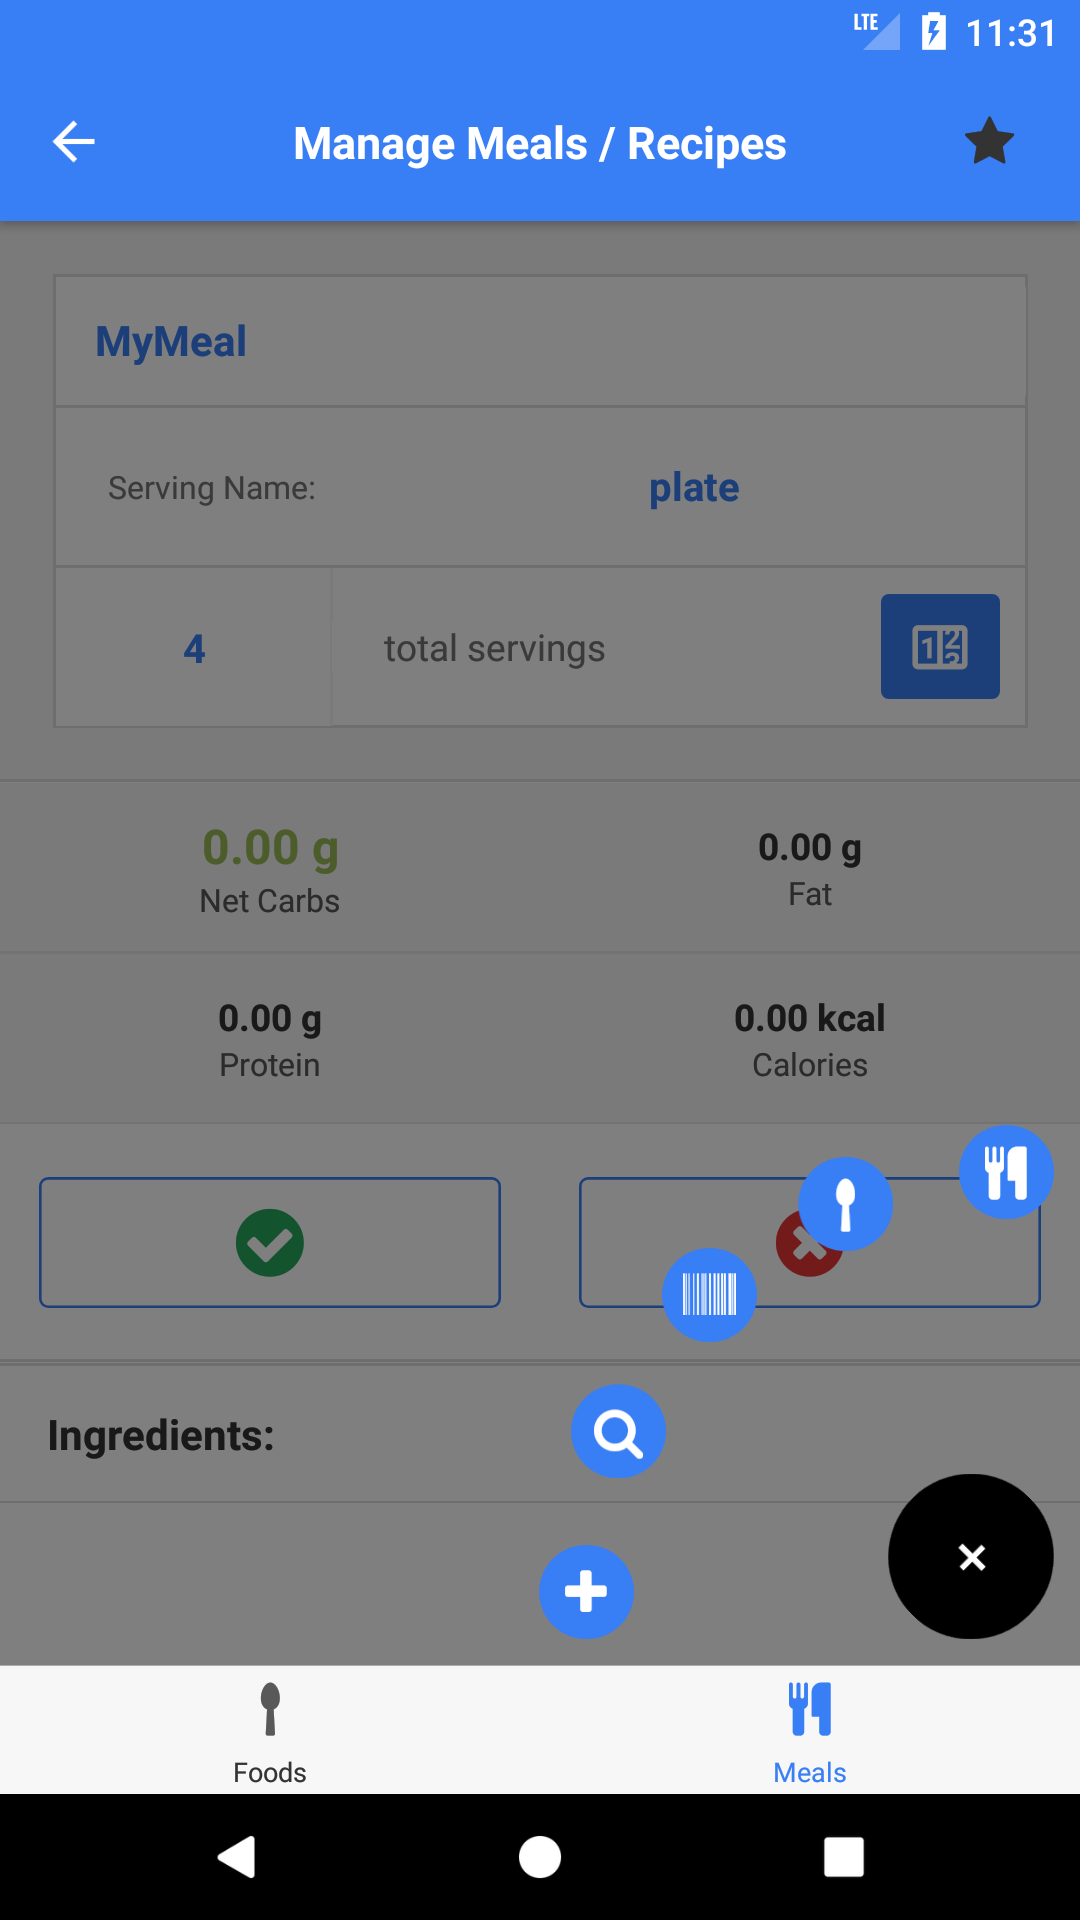
Click the blue + button to start adding ingredients. Ingredients can come from all the sources that you can normally add foods to your log. From left to right on the action button: Quick Macros, Search Foods, Scan Foods, Saved Foods, Saved Meals.
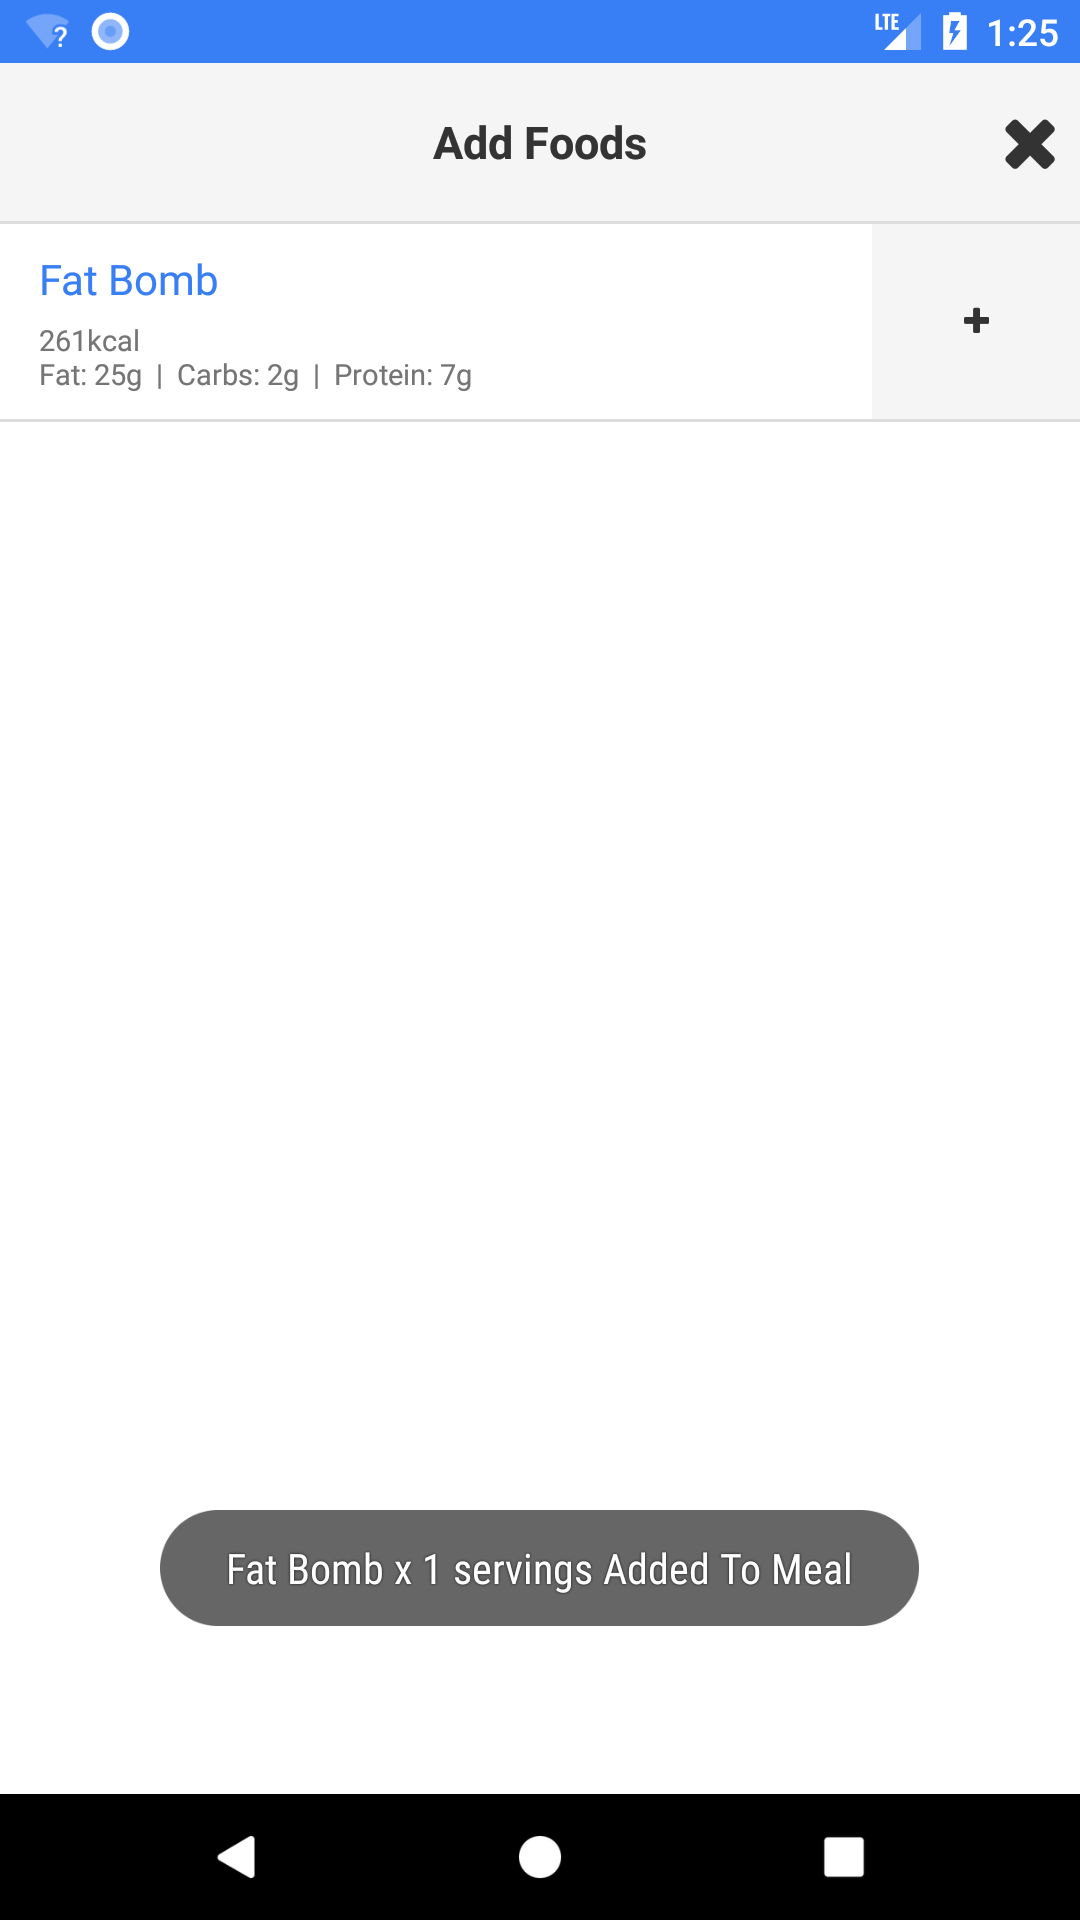
Here is an example of adding previously created custom foods to your meal/recipe.
When you are done adding foods, simply click the green Save button and your meal will be ready for use. If you find that you need to delete or update your ingredients and amounts, you can click the red minus button to completely remove an item OR you can click on the ingredient itself to pull up an edit screen.
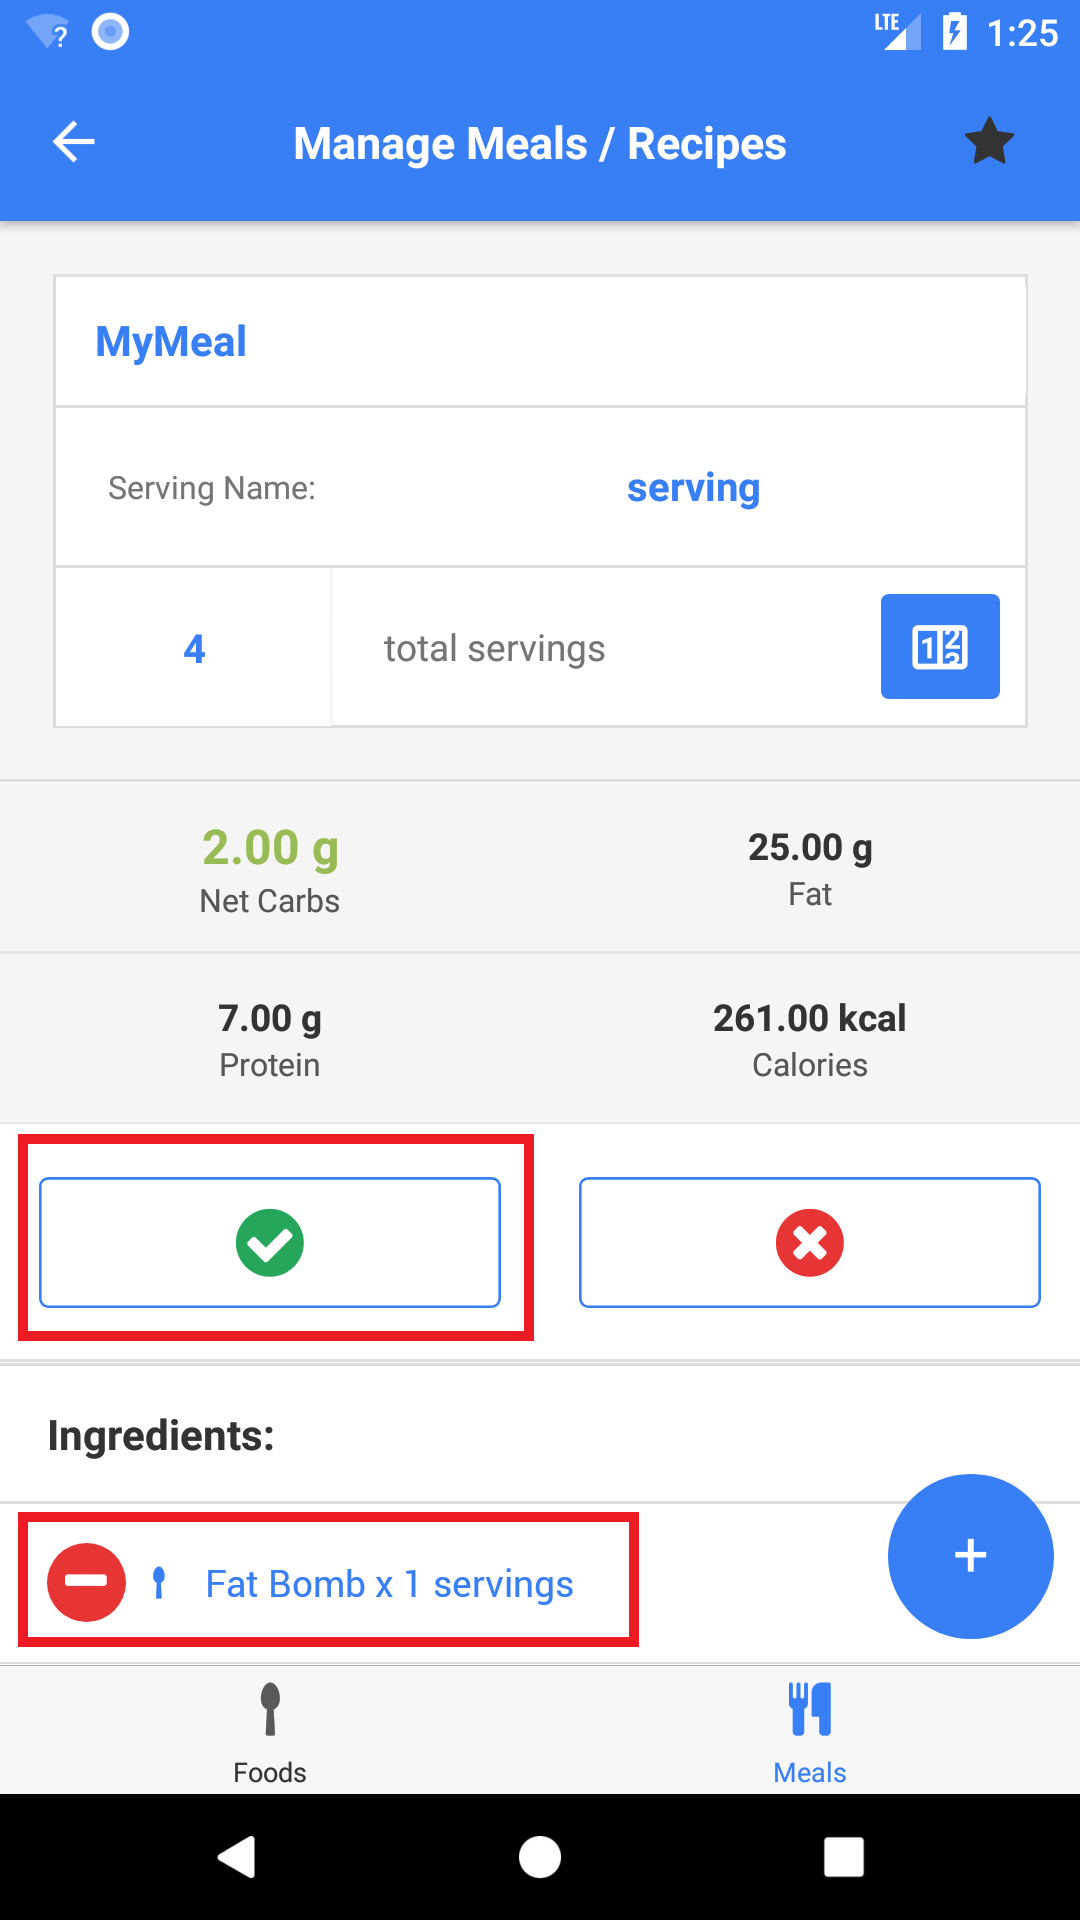
Upon saving the meal, you will see that 1 serving is automatically calculated based on the total number of servings that the meal/recipe is supposed to make.

Leave A Comment